## Don't Get Your Text Covered
Upload your video or image and see exactly how it will look on TikTok, Instagram Reels, and YouTube Shorts. Keep your important text and graphics out of the 'danger zones'.
Social Safe-Zone Simulator
Overlay a visual mockup of social platforms' UI over your media.
Upload Vertical Media
Upload a 9:16 video or image to see how it looks under native social media UI overlays.
Related Article
Read the full article below to learn more about the technology behind this tool.
How to Build a Cinematic Creator Studio Under $200 (Forget Expensive Cameras)
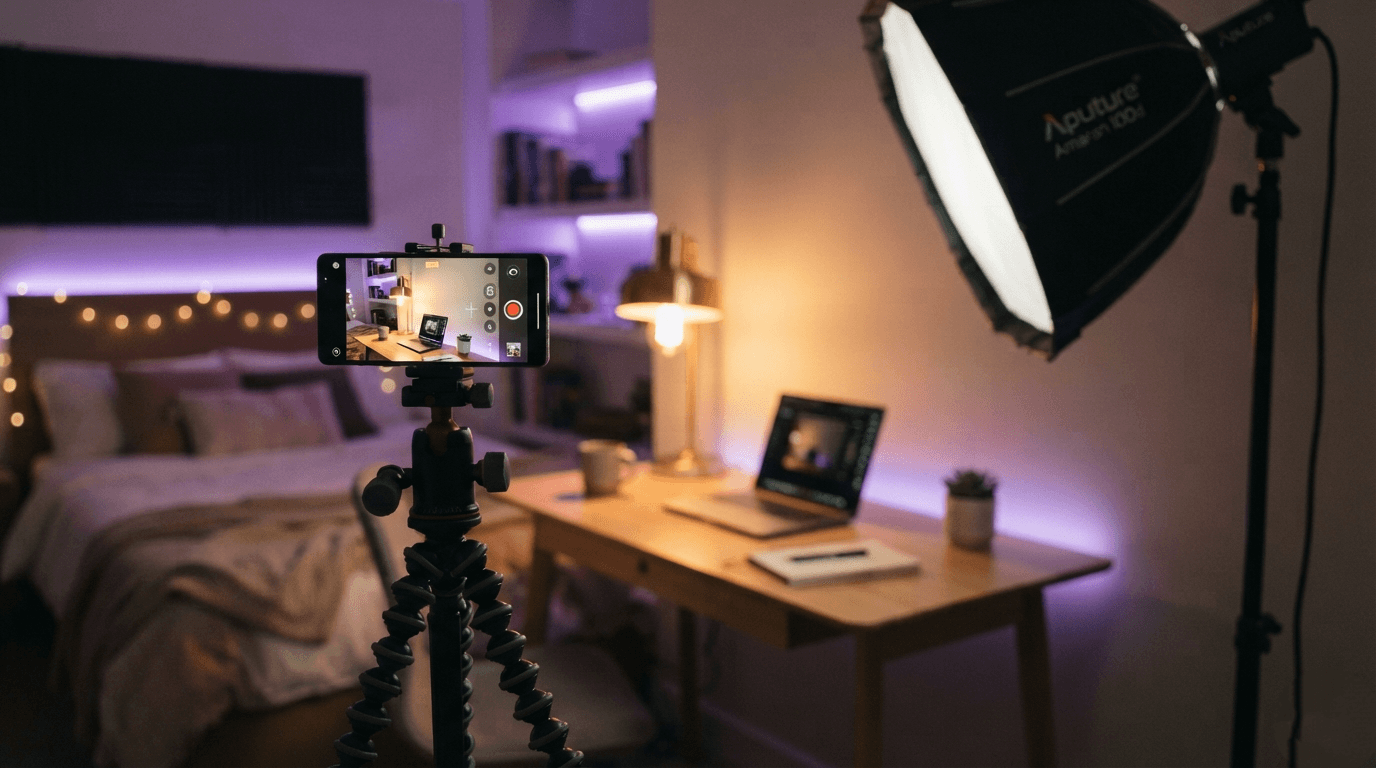
We have all been there. You watch your favorite YouTuber, see their perfectly blurred background and crispy video quality, and immediately think: "If I just had a $2,500 Sony camera, my videos would go viral too."
I am going to save you a lot of money right now: You are wrong.
I know creators who bought massive, expensive camera rigs, only to realize their videos still looked like a hostage ransom tape. Why? Because a great camera cannot fix terrible lighting or echoey audio.
You do not need a bank loan to start creating high-quality content. In fact, if you have a smartphone made in the last four years, you already own a 4K camera. Here is exactly how to build a cinematic creator studio in your bedroom for under $200.
Rule #1: Audio is King (Budget: $50)
Here is a harsh truth about content creation: People will watch a video with bad video quality if the audio is good, but they will instantly click away from a 4K video if the audio is terrible. Bad audio physically hurts the ears.
Do not use your phone's built-in microphone from across the room. Instead, invest in a dedicated mic. You have two incredibly affordable options:
- For Desk Creators (Podcasts/Gaming): Get a USB dynamic microphone like the Fifine AmpliGame or the Samson Q2U. For around $50, you get a deep, rich radio-broadcaster voice. Just make sure you keep the mic very close to your mouth.
- For Moving Creators (Vlogs/Fitness): Grab a wireless lavalier microphone. Brands like Boya or Hollyland make great plug-and-play wireless mics for smartphones that cost less than $40.
Rule #2: Lighting Makes the Magic (Budget: $100)
Lighting is the secret sauce. It is what separates amateurs from professionals. You do not need expensive Aputure lights to get a cinematic look. You just need to understand the "Three-Point Lighting" concept—or a cheaper, simpler version of it.
The Key Light
This is your main light source. Never film with the overhead ceiling light in your room (it creates ugly shadows under your eyes). Instead, buy a cheap softbox lighting kit from Amazon (usually around $50 for a pair) or a large Ring Light. Position it at a 45-degree angle in front of your face. This creates soft, flattering light.
The Practical Lights
Practical lights are simply regular lights visible in the background of your video. Think of a small desk lamp with a warm bulb, some cheap LED strip lights behind your monitor, or a neon sign. These cost barely $20 but add incredible depth and personality to a boring room.
Rule #3: Maximize Your Smartphone Camera (Budget: $0 - $30)
Now that your audio is crisp and your face is well-lit, it is time to optimize the camera you already have in your pocket.
First, always clean your lens. It sounds silly, but a fingerprint smudge will ruin your video quality faster than anything else. Second, always use the back camera of your phone. The front-facing selfie camera is significantly lower quality.
To keep the phone stable, buy a basic, sturdy tripod ($20 - $30). If you want to get fancy, download a pro camera app (like Blackmagic Camera, which is free!) to manually lock your exposure and focus. This stops the camera from randomly changing brightness while you are talking.
The Final Touch: Set Design (Budget: $20)
You don't need a massive studio space. A small corner of your bedroom is enough. Just clean it up. A messy bed in the background is distracting.
Add a few personal touches that tell the audience who you are without you speaking. A couple of books on a shelf, a poster of your favorite movie, or a small fake plant. Keep it simple and authentic.
Final Thoughts
Let's do the math: $50 for a mic + $70 for softboxes and background lights + $30 for a tripod = $150. You still have $50 left over for coffee!
Gear is just a tool; it is not the message. The best equipment in the world won't save a boring script, but a great personality and valuable information can absolutely overcome budget gear. Stop making excuses about what you don't have. Set up your lights, plug in your mic, and hit record.